Drills
Drill #
Table Diagram
Drill Name
32
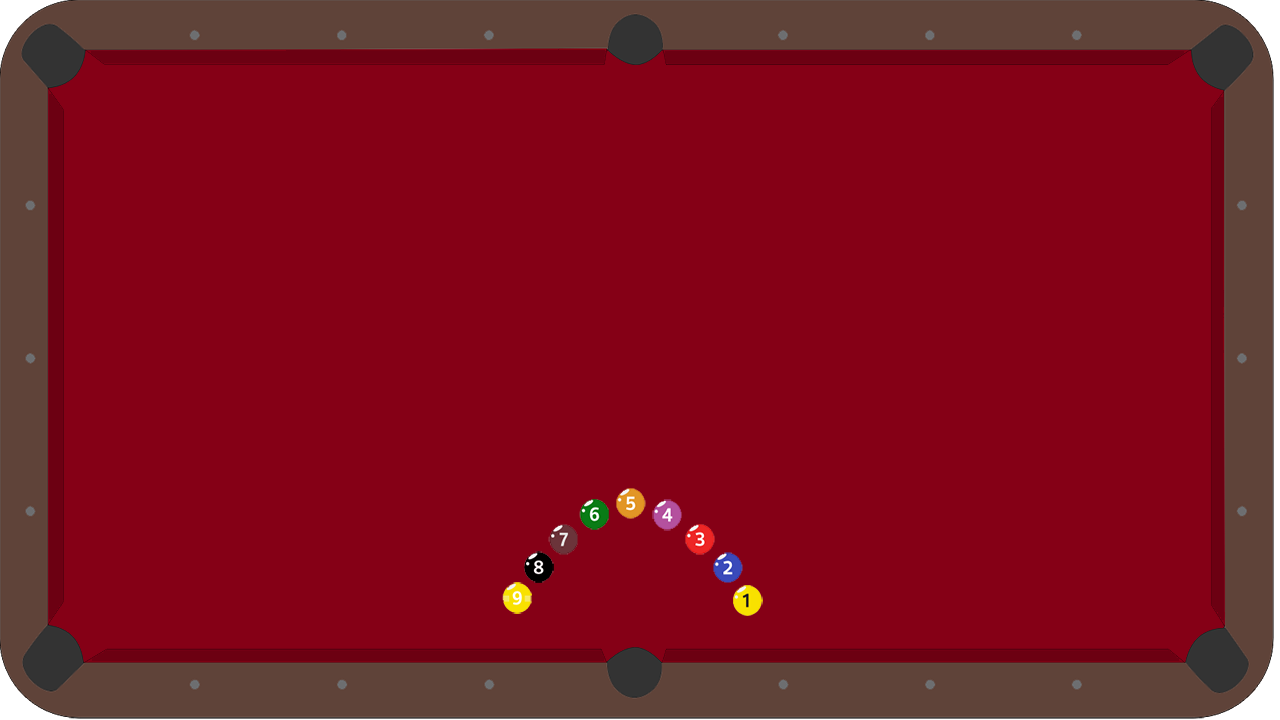
The "C" Drill with 9 Balls
31
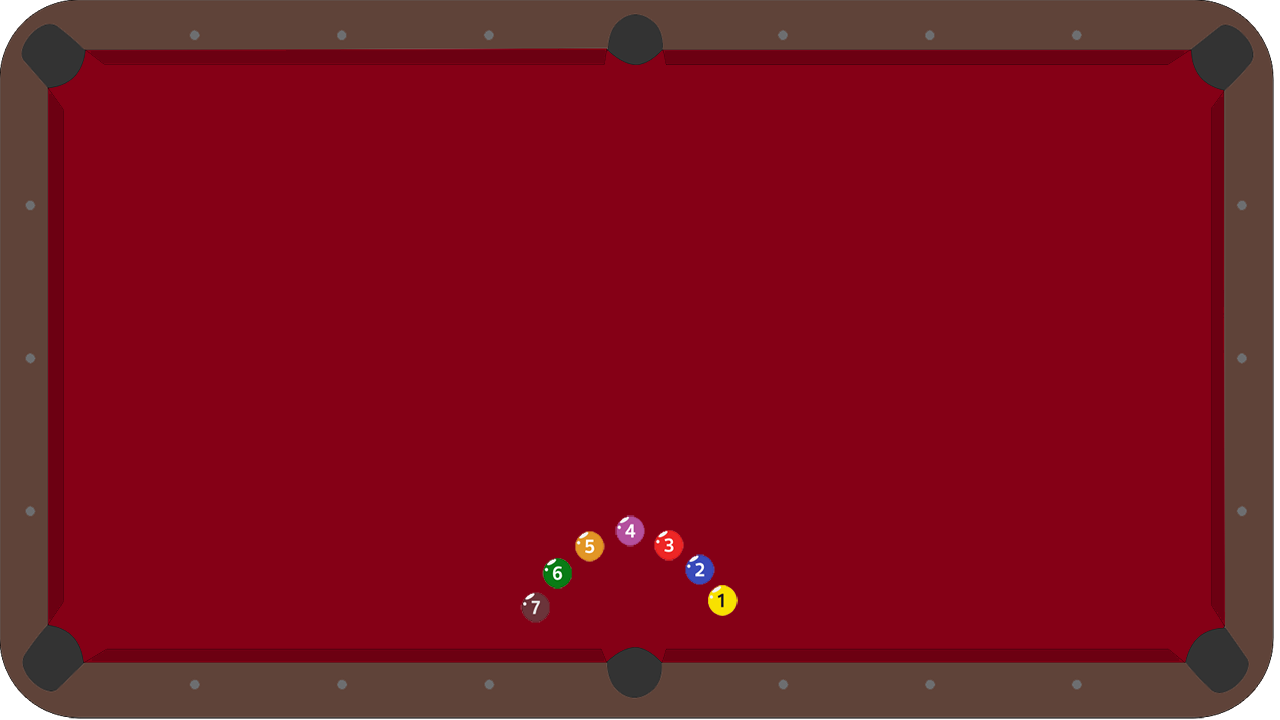
The "C" Drill with 7 Balls
30
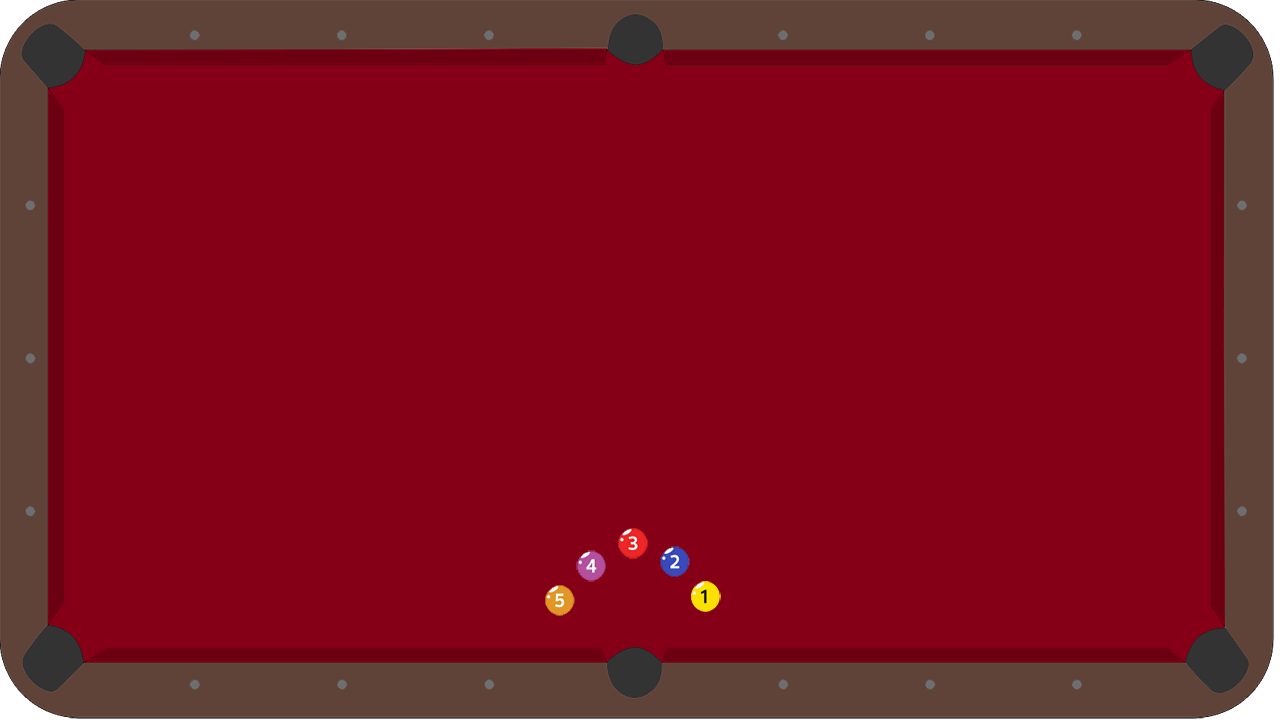
The "C" Drill with 5 Balls
29
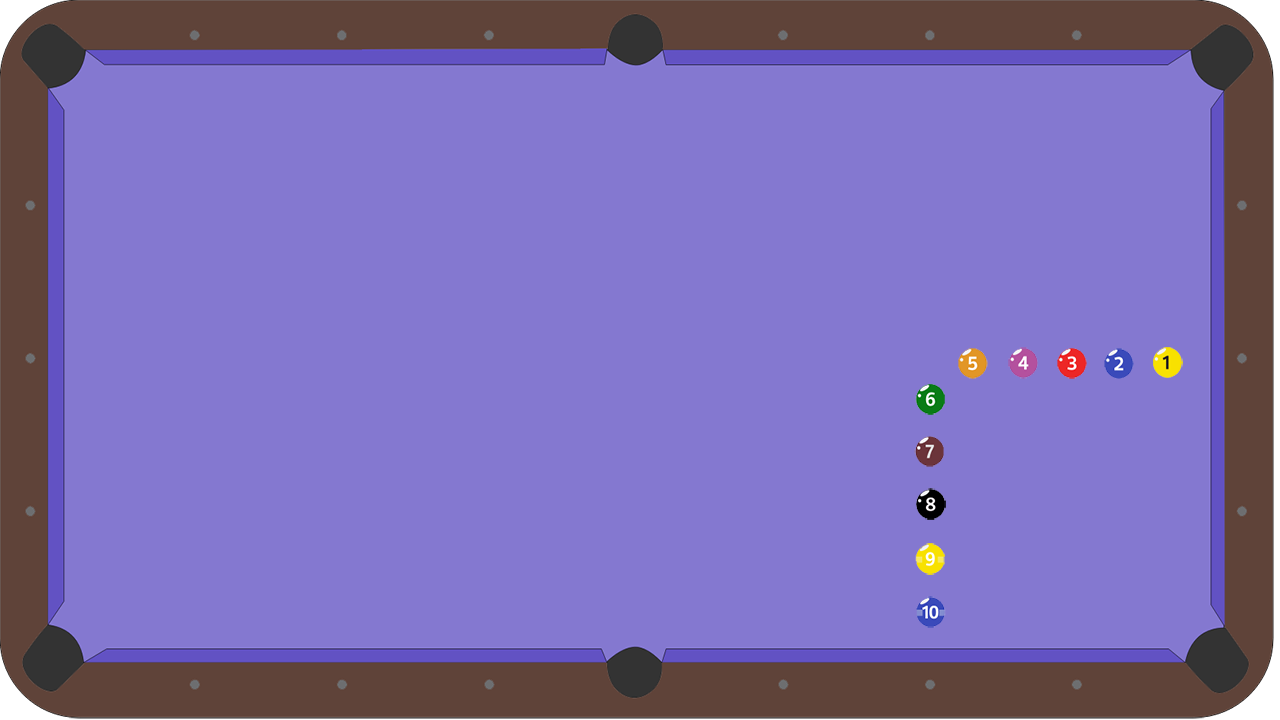
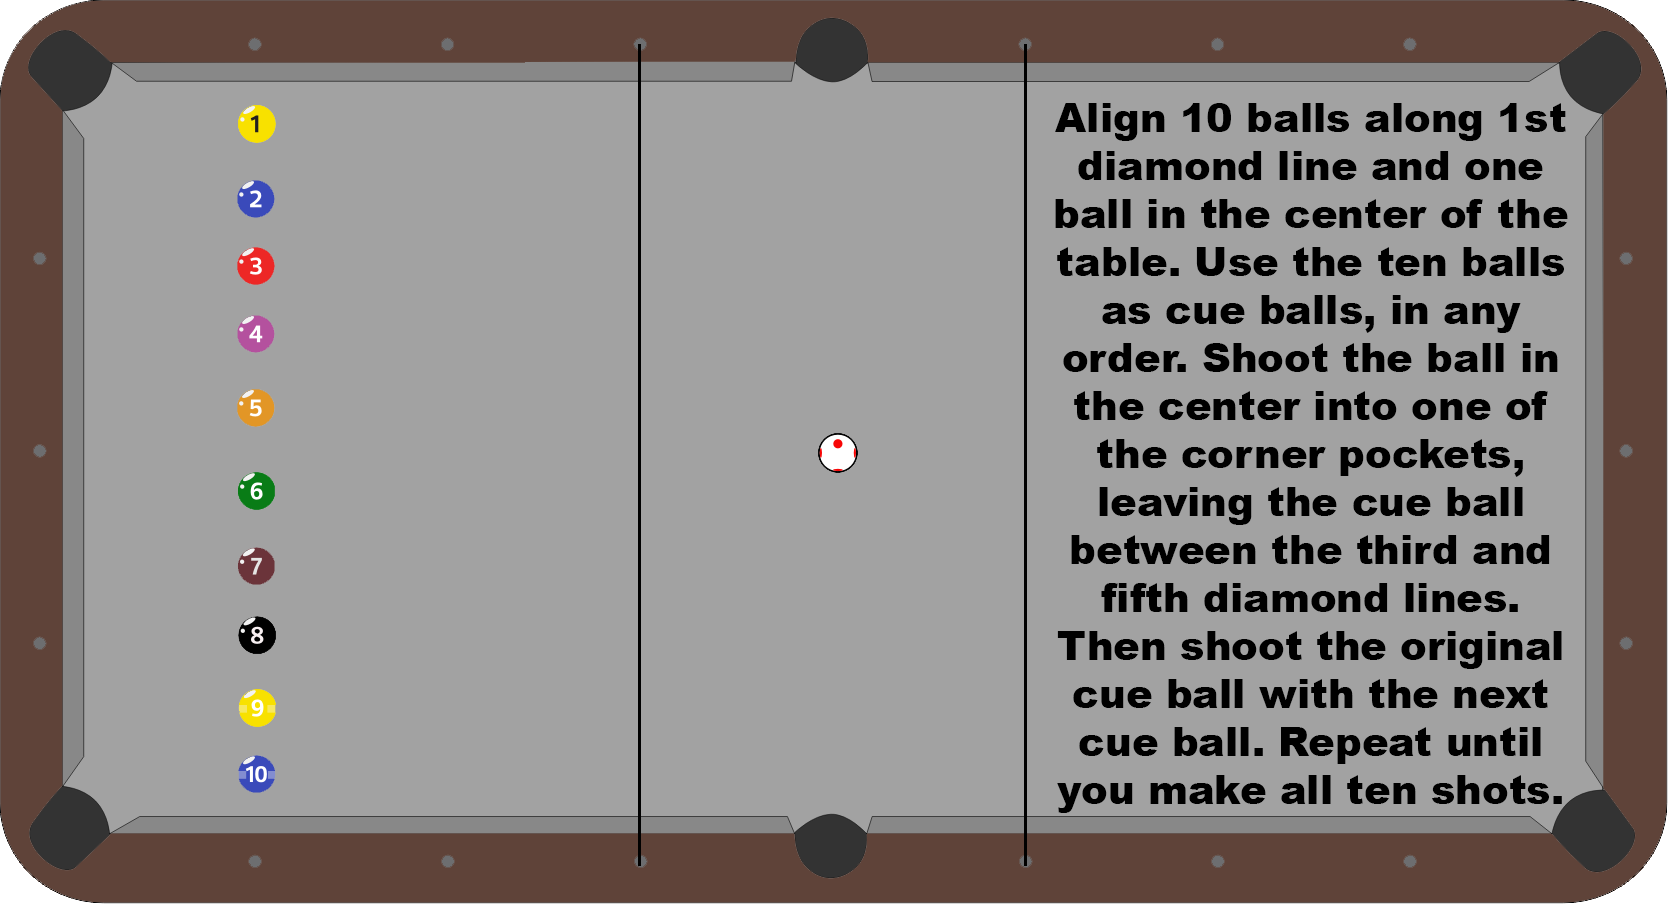
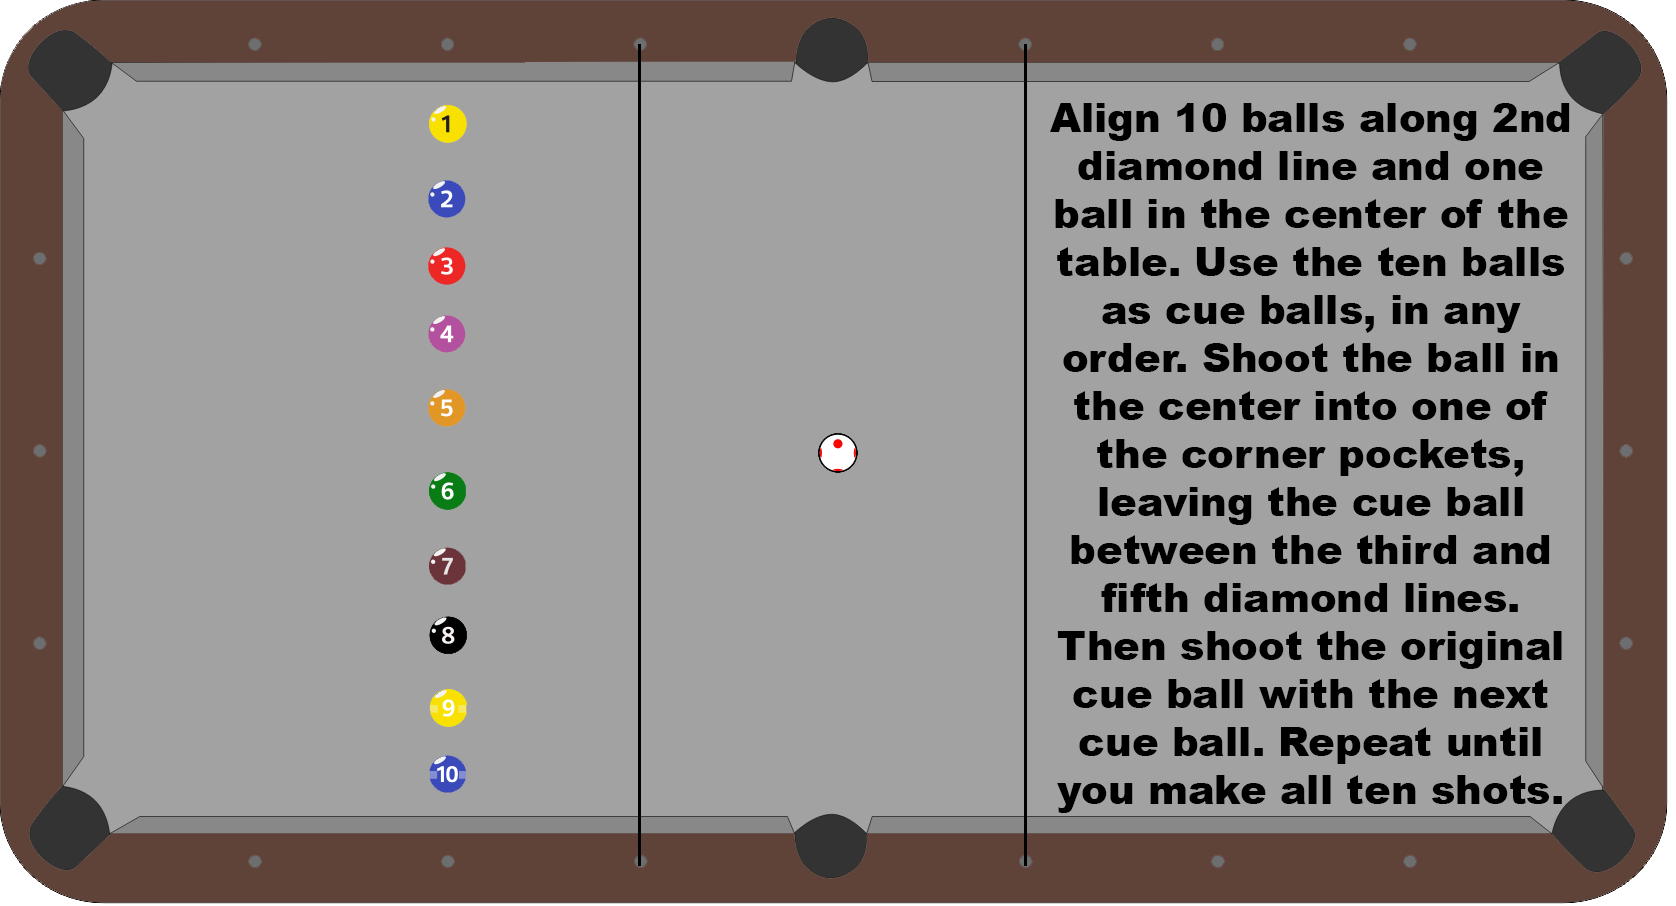
The "L" Drill with 10 Balls
28
The "L" Drill with 8 Balls
27
The "L" Drill with 6 Balls
26
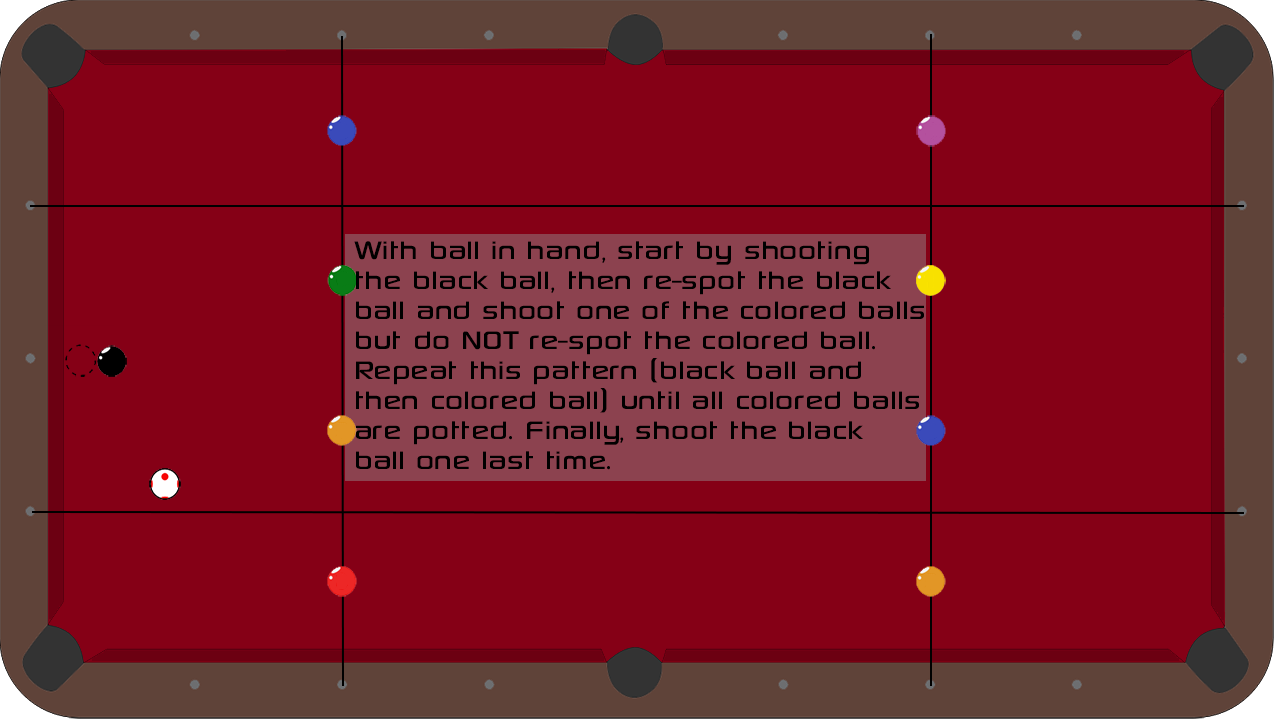
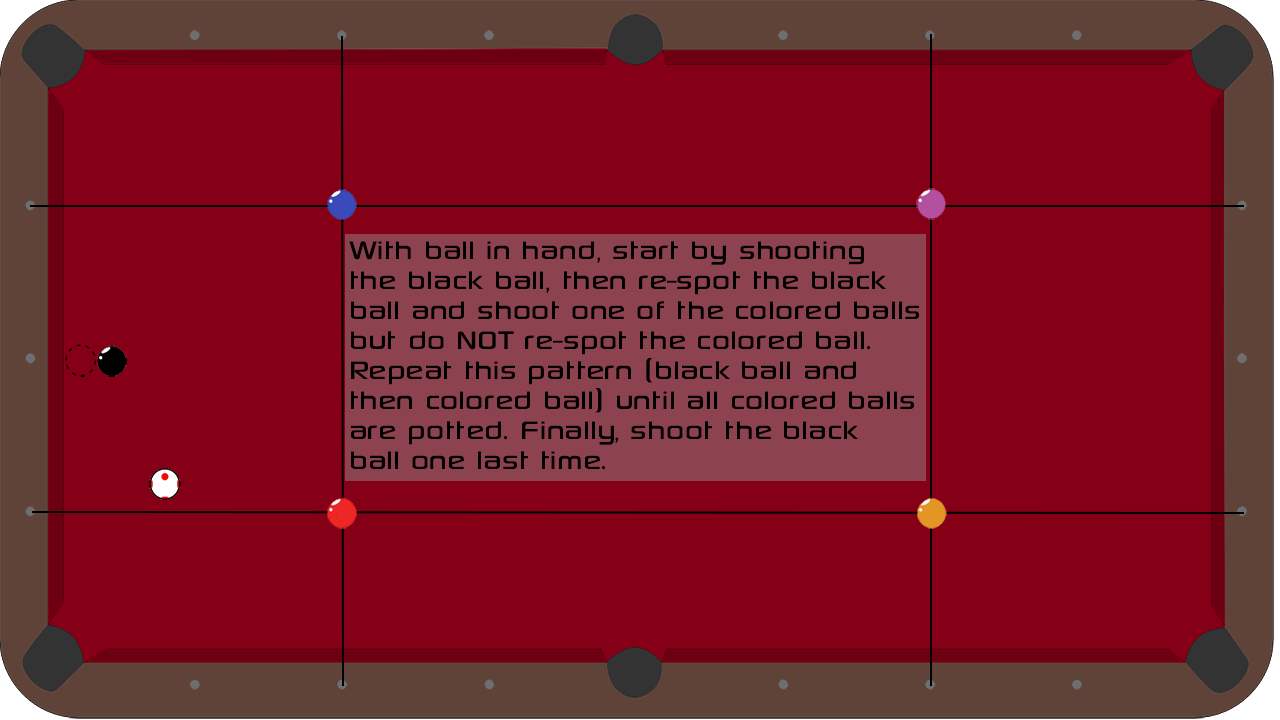
Black Ball Drill, Level A
25
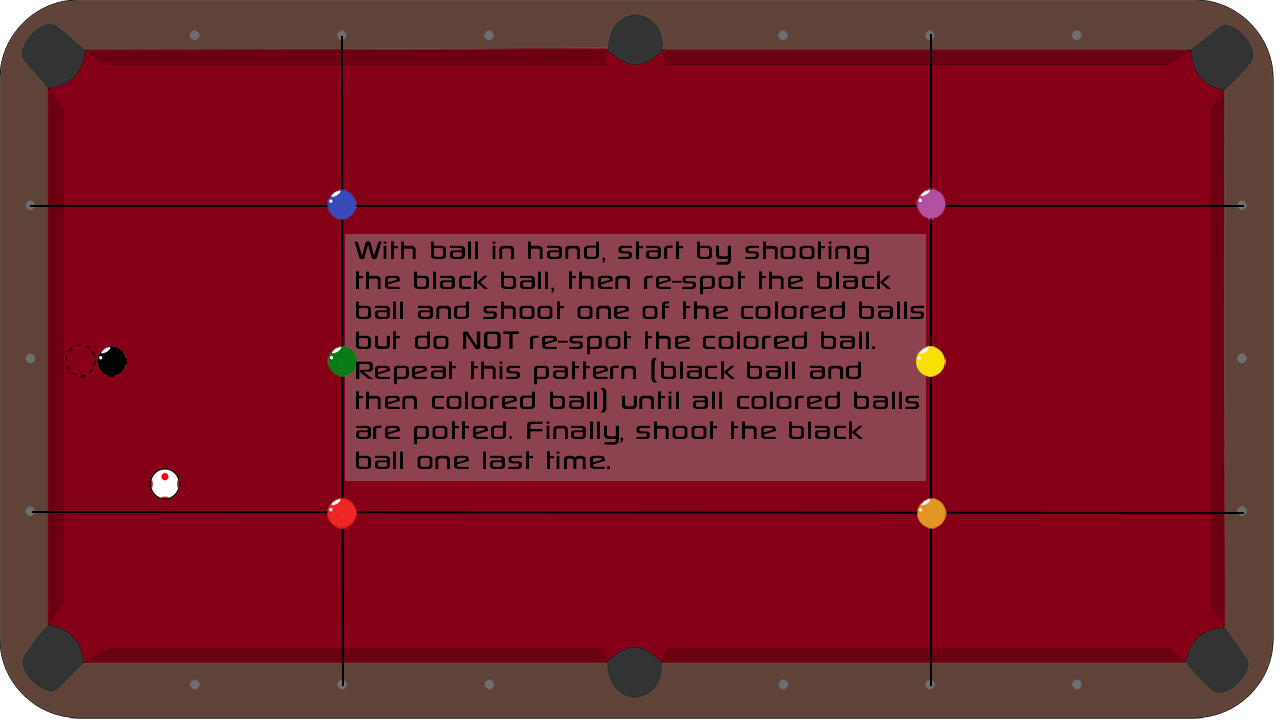
Black Ball Drill, Level B
24
Black Ball Drill, Level C
23
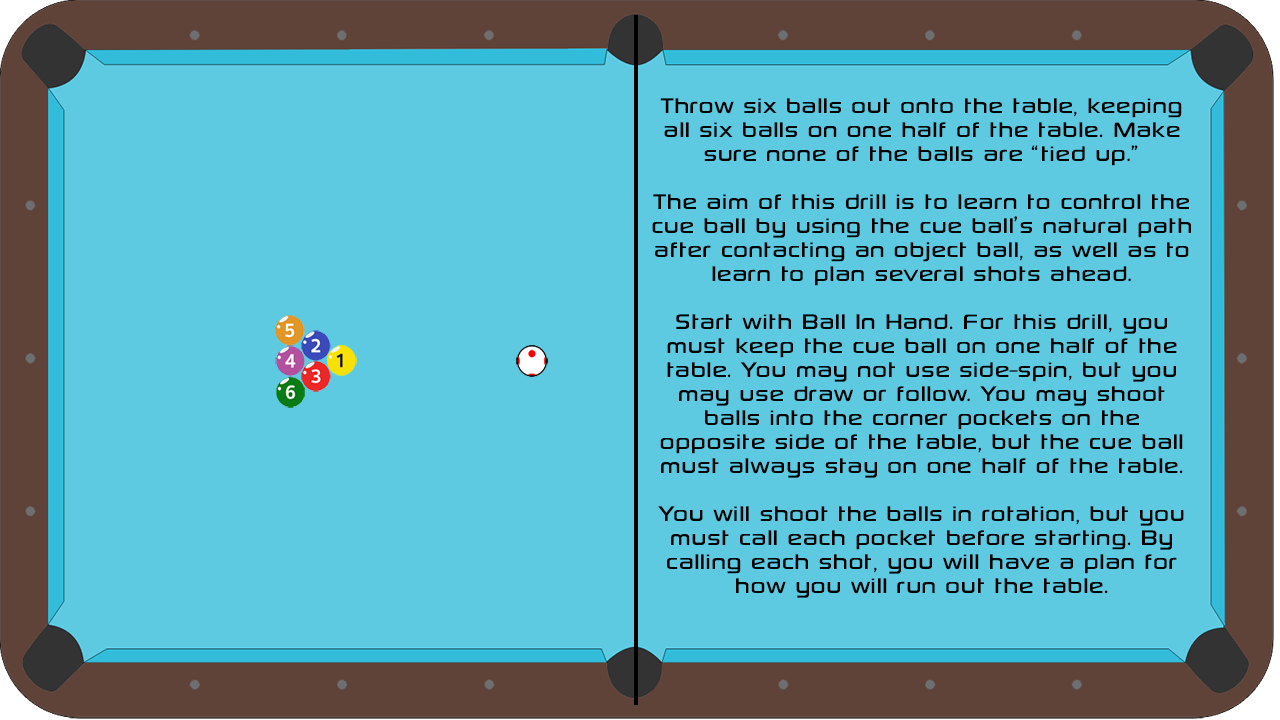
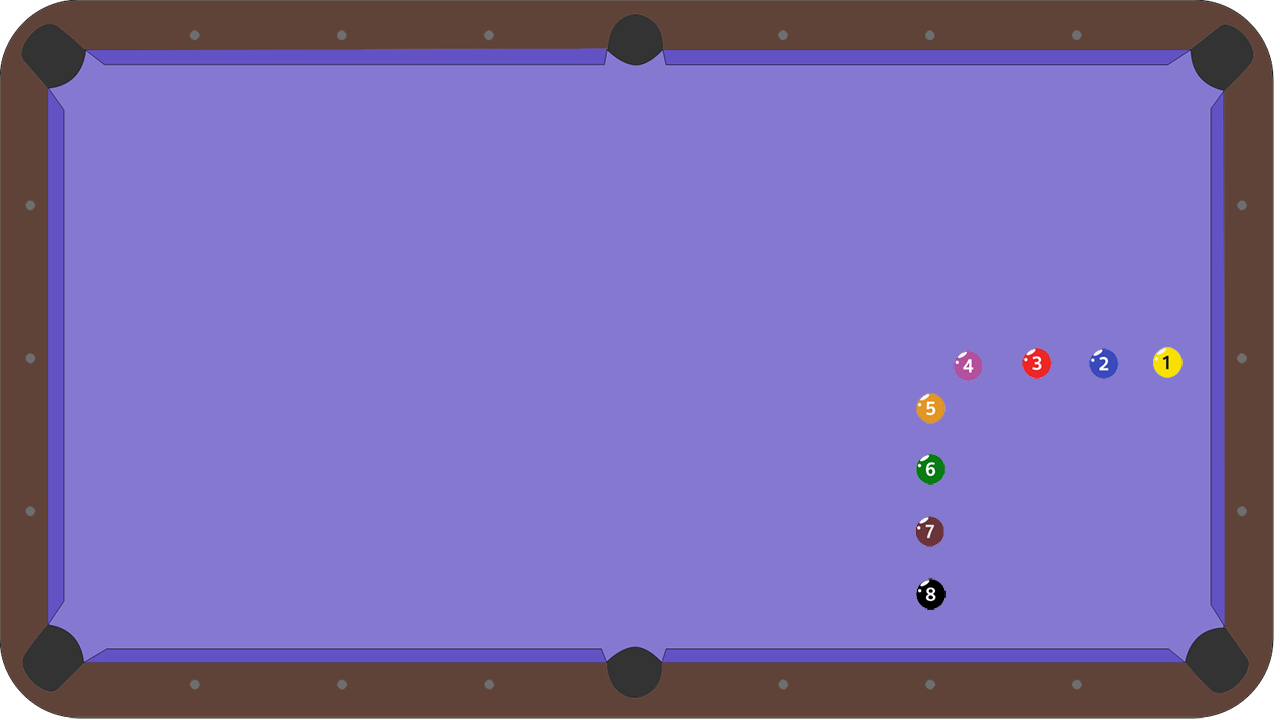
6 Ball Half-table Pattern Play
22

5 Ball Half-table Pattern Play
21

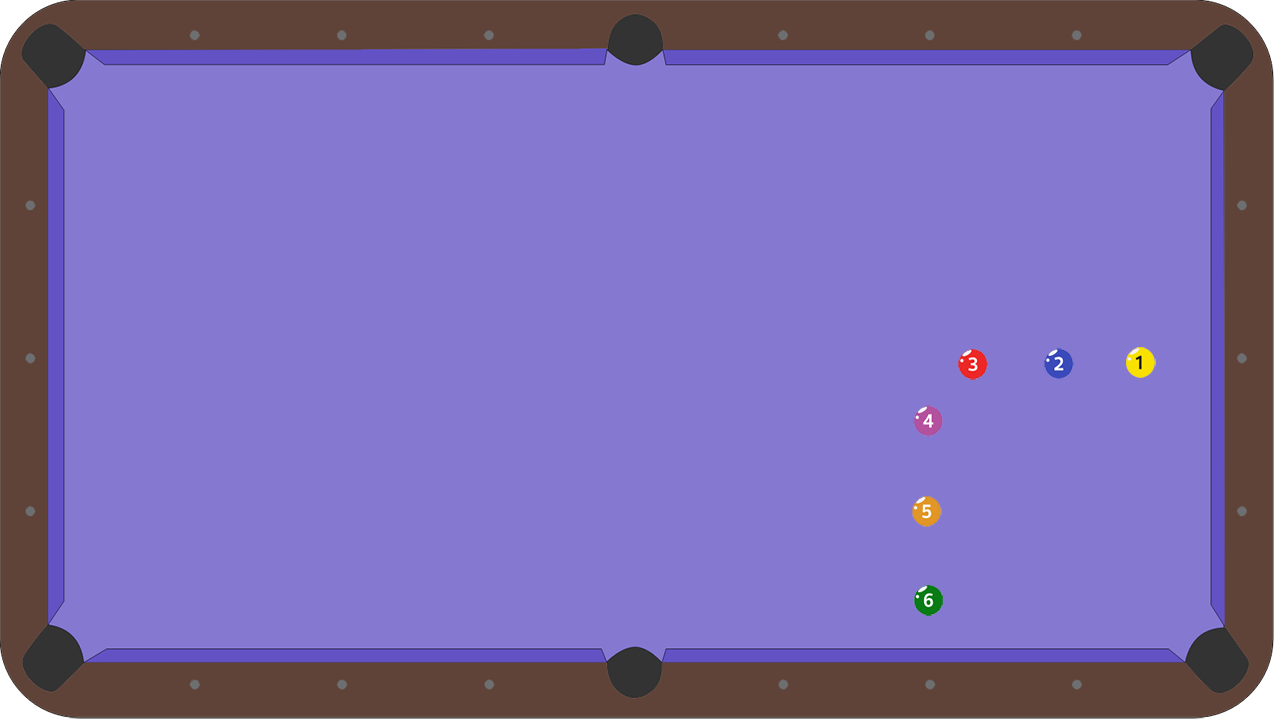
4 Ball Half-table Pattern Play
20
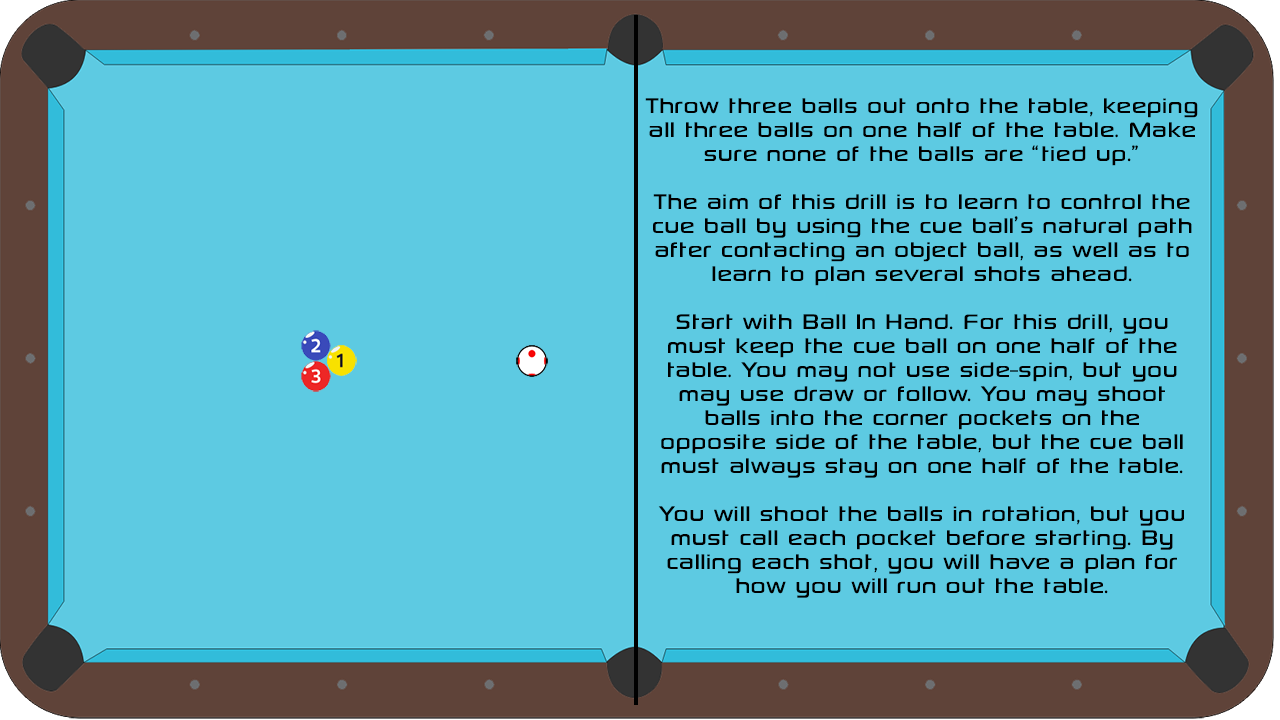
3 Ball Half-table Pattern Play
19
Centerline Drill, Level A
18
Centerline Drill, Level B
17
Centerline Drill, Level C
16
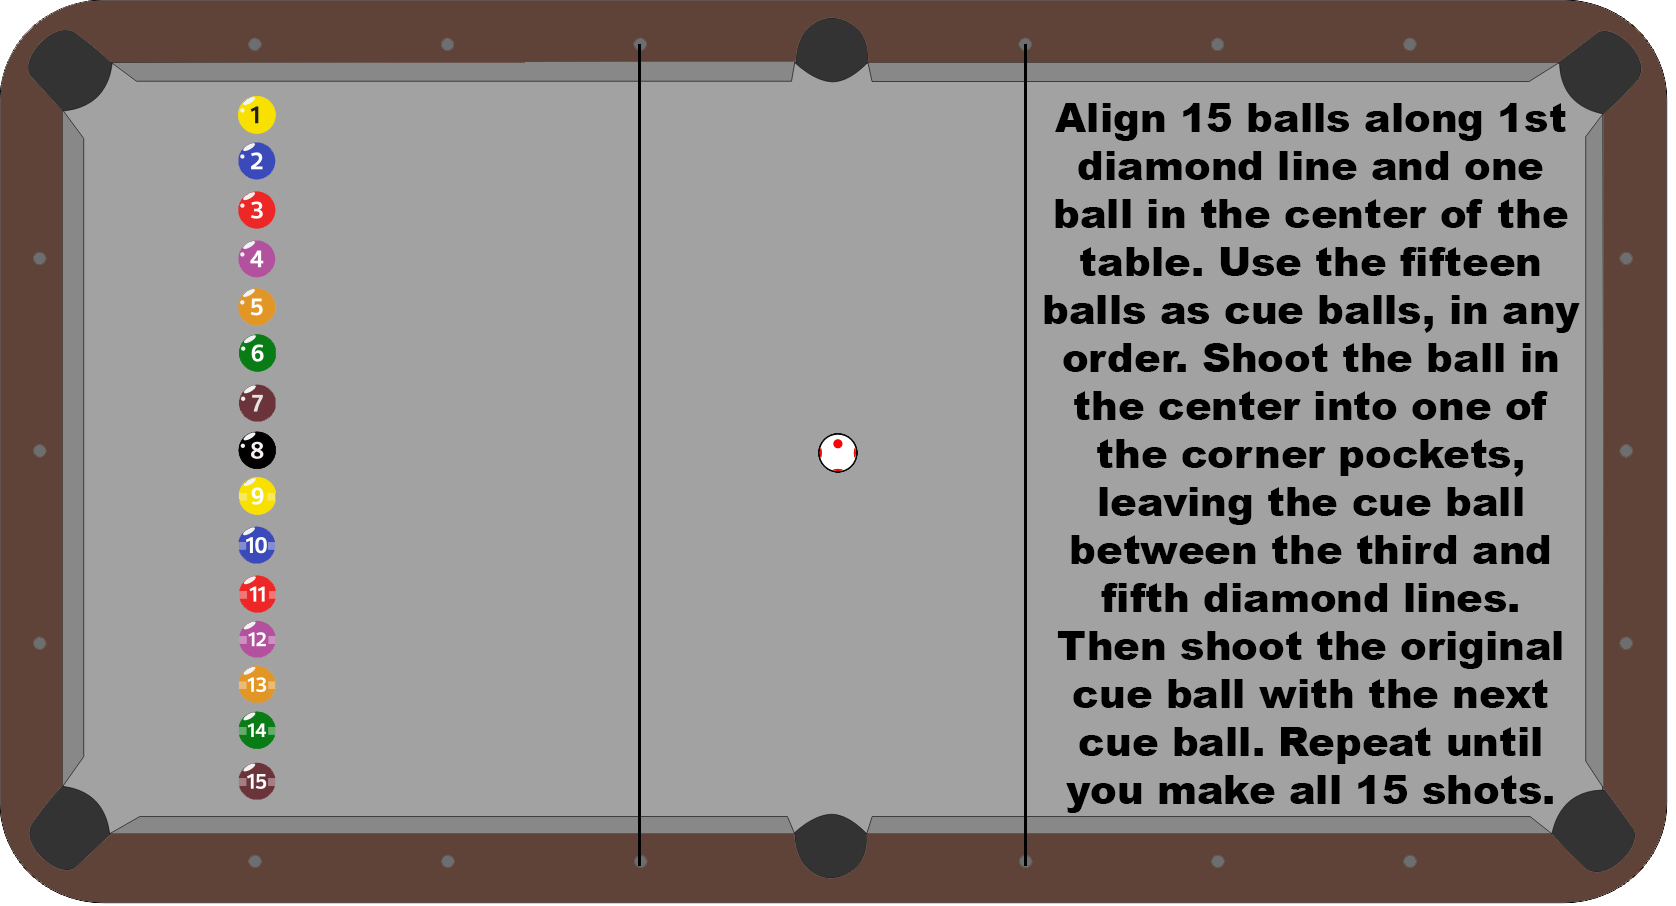
Billiard University Exam 1 Stop Shot Drill
15

Billiard University Exam 1 Stop Shot, Zone 7
14

Billiard University Exam 1 Stop Shot, Zone 6
13
Billiard University Exam 1 Stop Shot, Zone 5
12
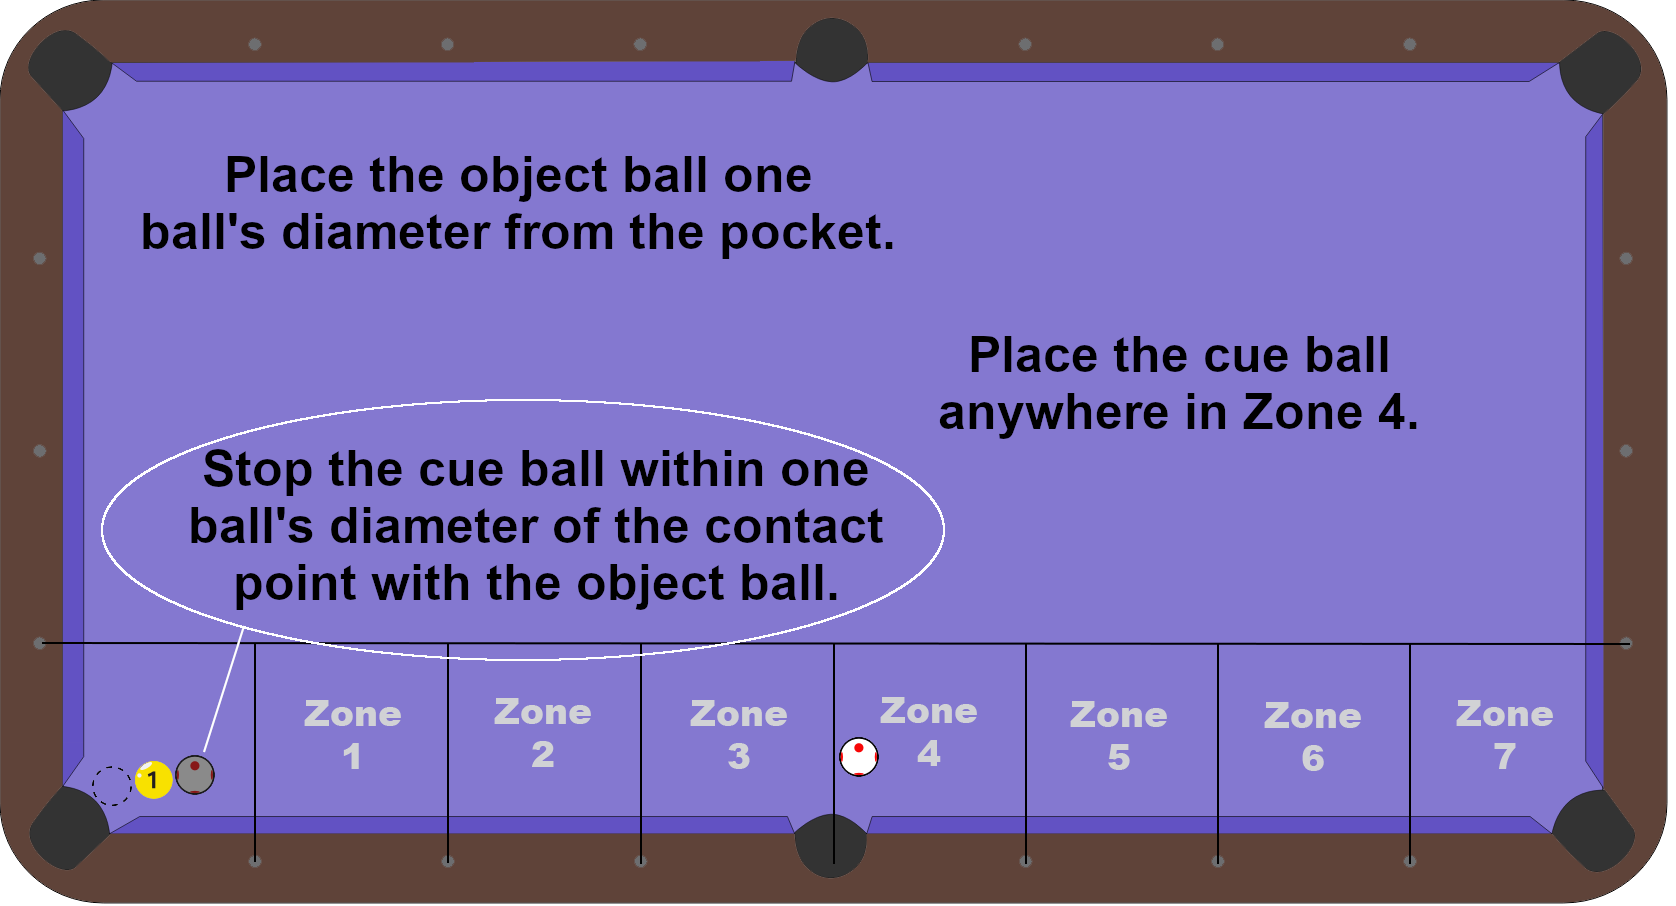
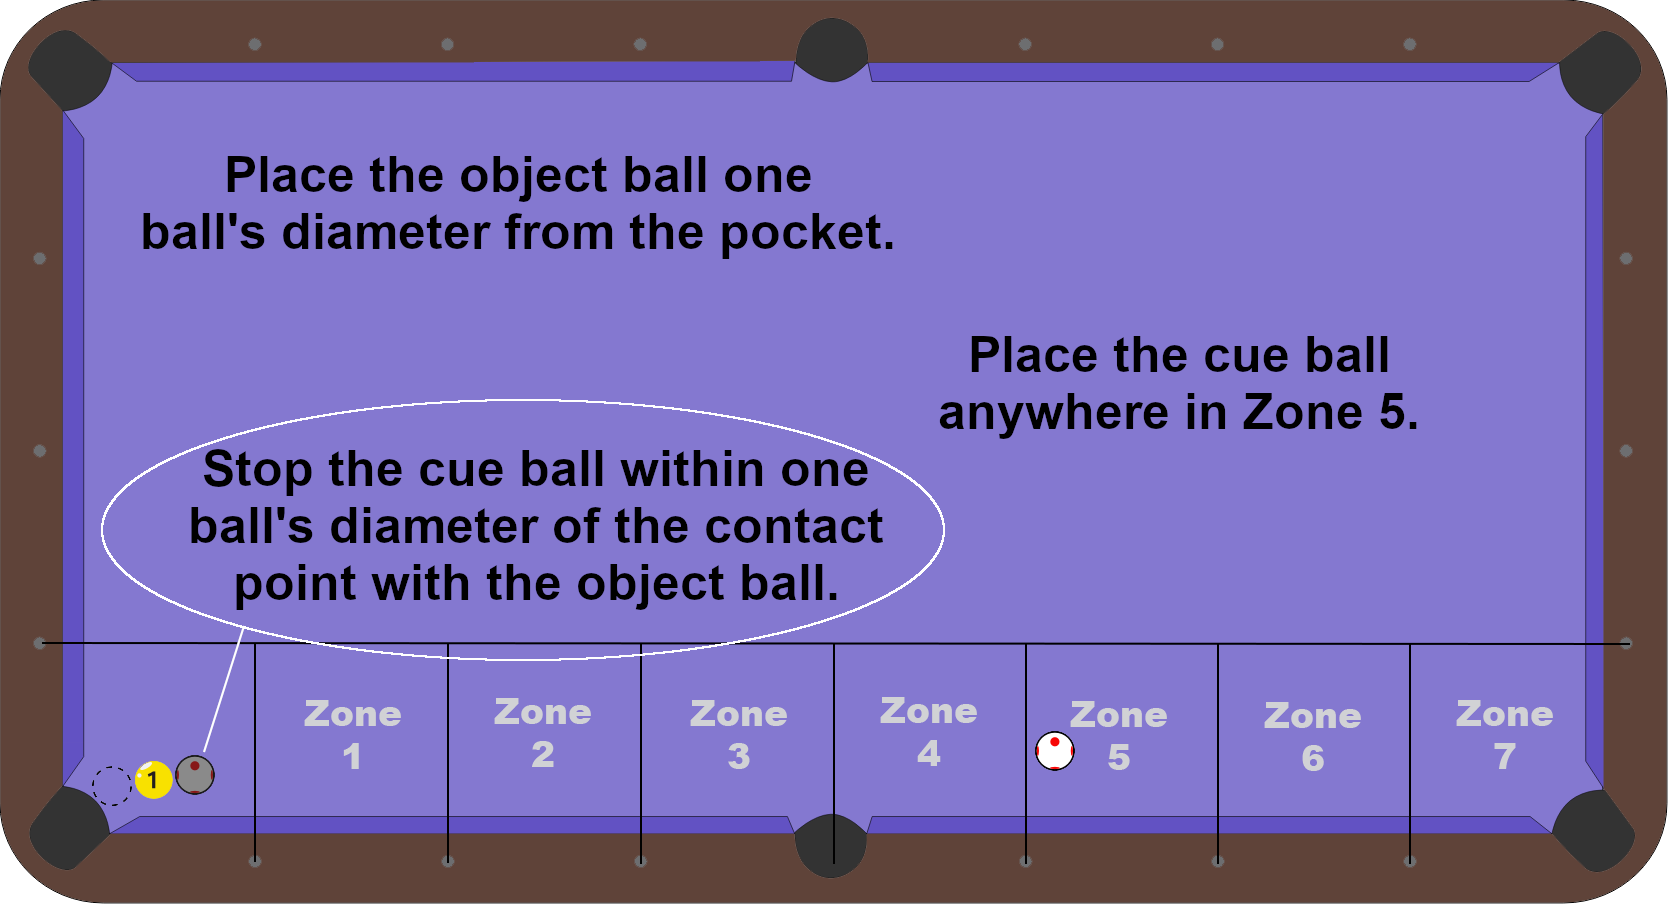
Billiard University Exam 1 Stop Shot, Zone 4
11
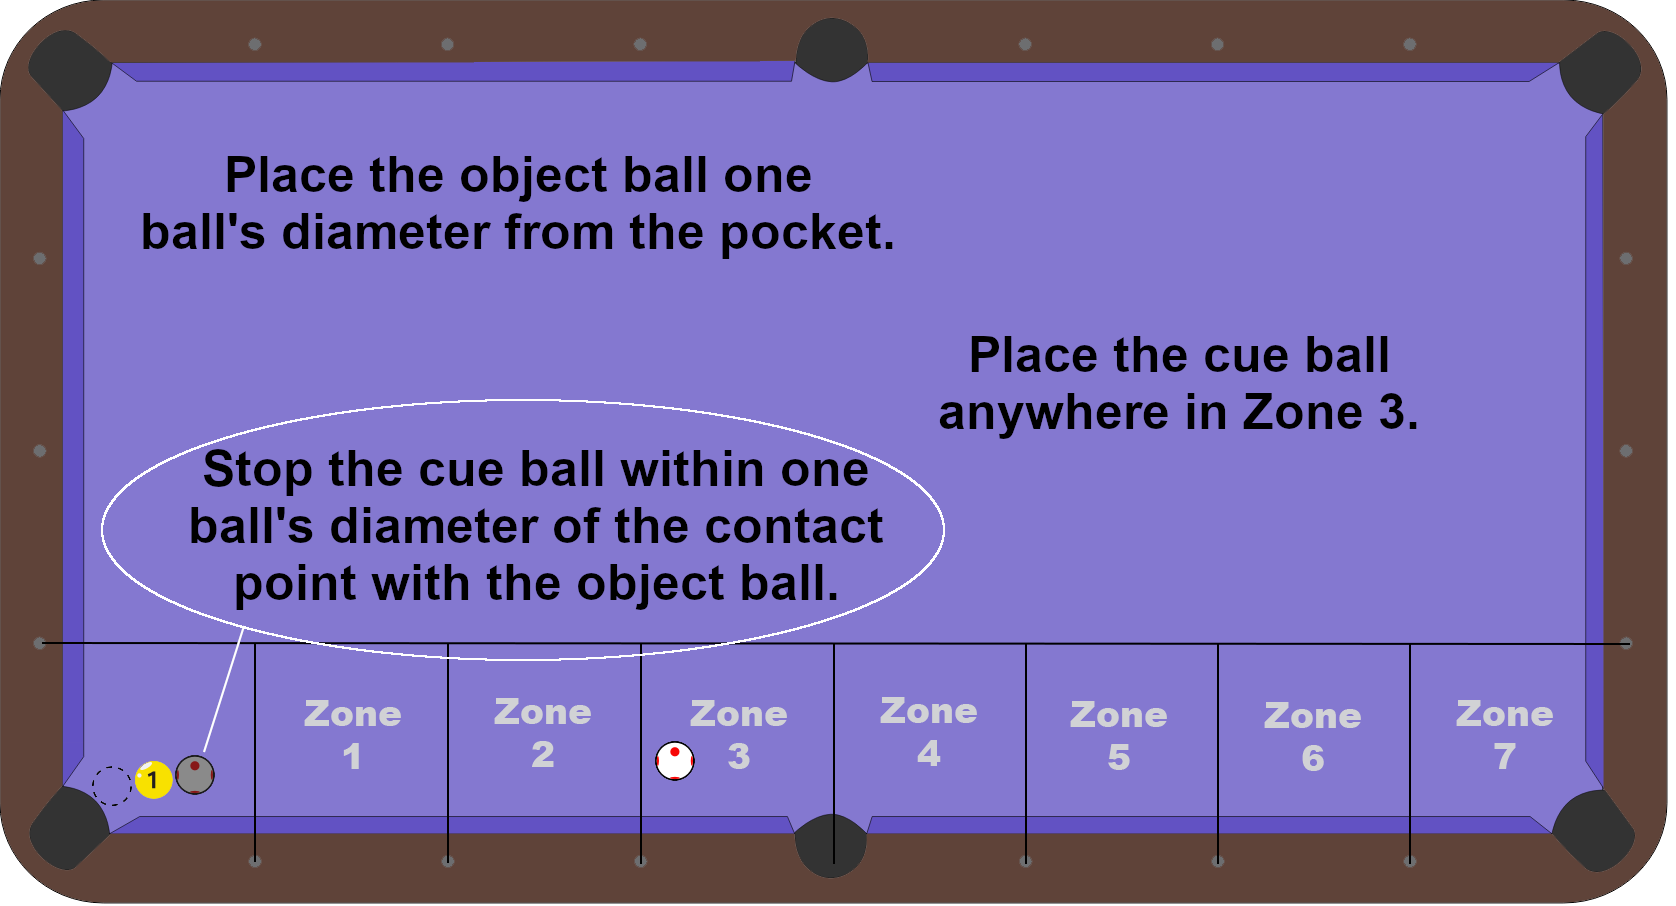
Billiard University Exam 1 Stop Shot, Zone 3
10

Billiard University Exam 1 Stop Shot, Zone 2
9
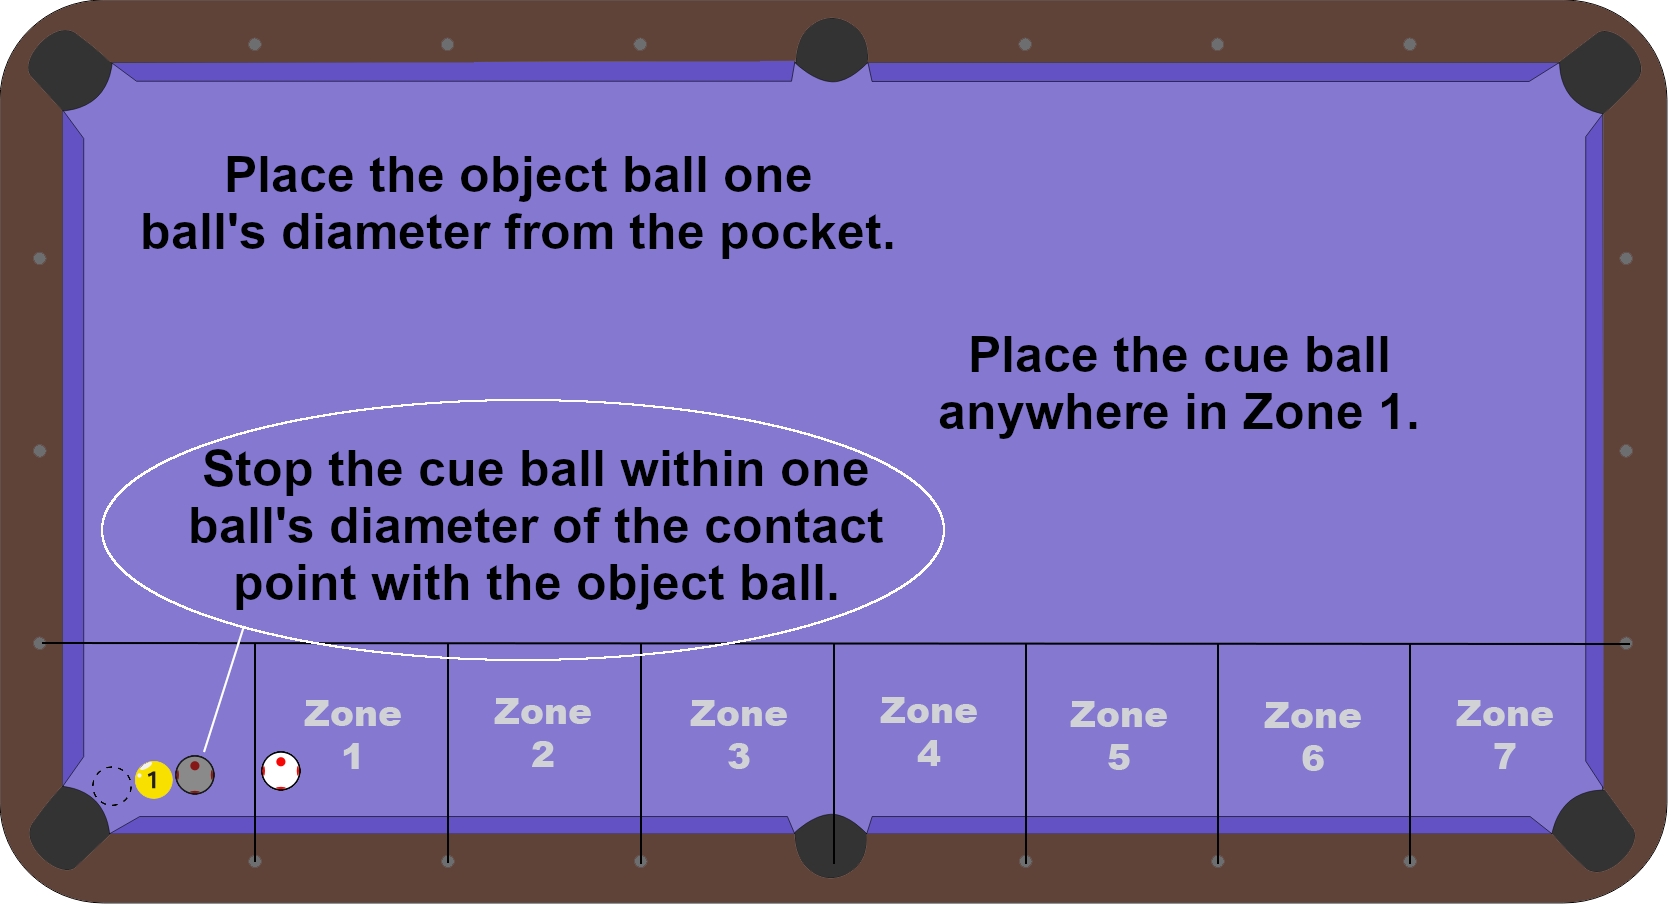
Billiard University Exam 1 Stop Shot, Zone 1
8
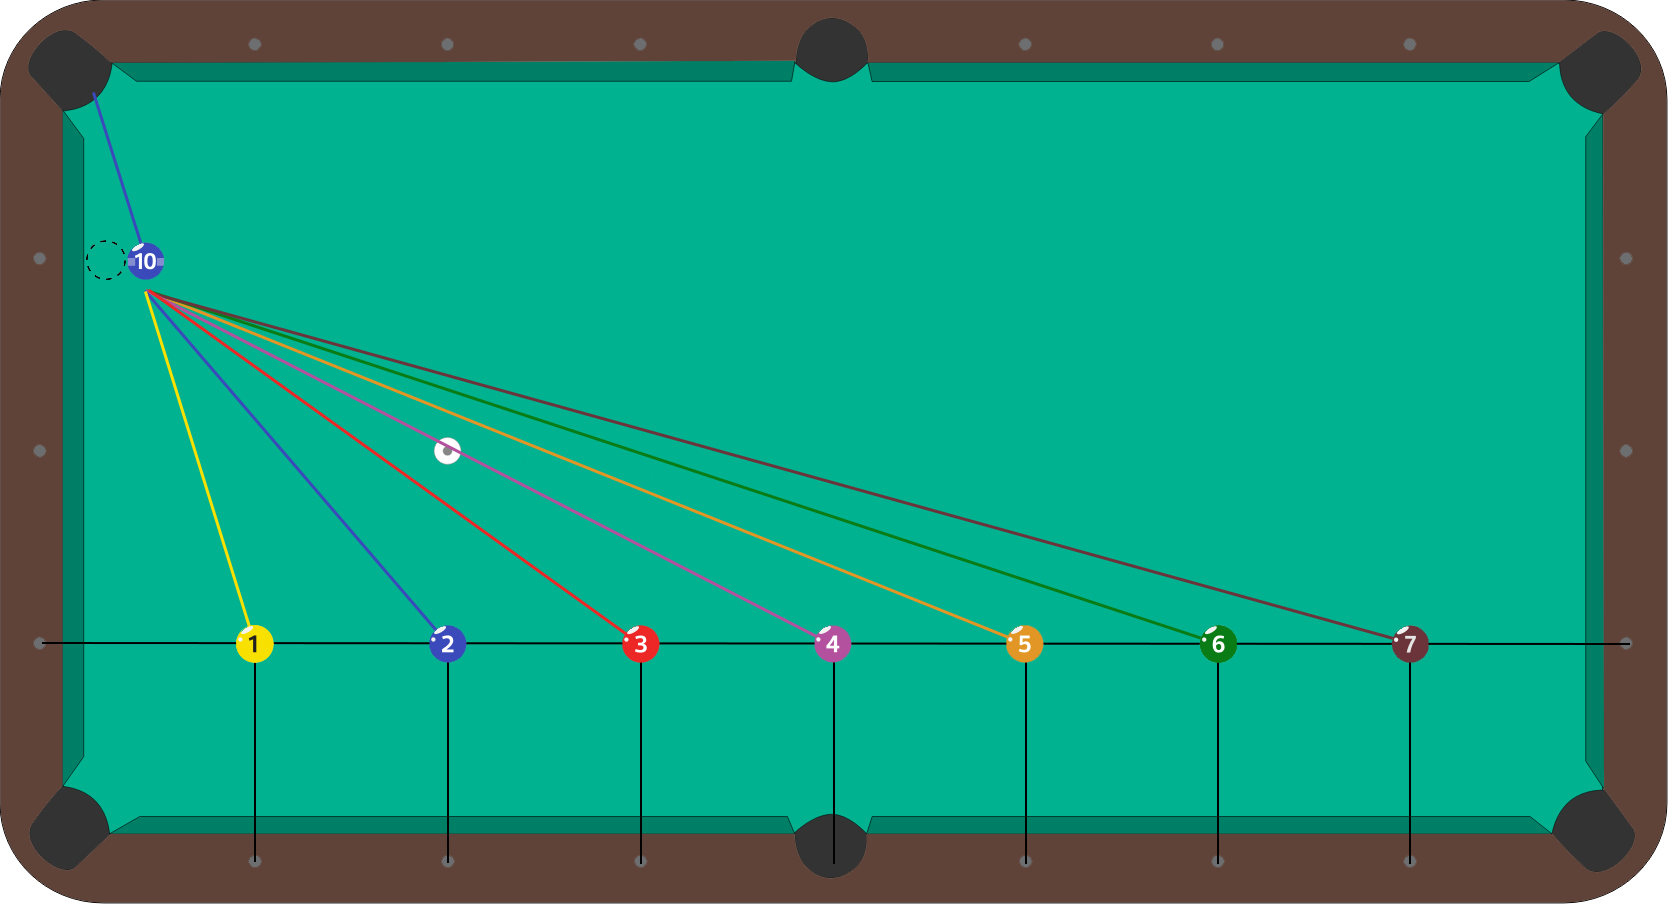
Billiard University Exam 1 Cut Shot Drill
7
Billiard University Exam 1 Cut Shot, Position 7
6
Billiard University Exam 1 Cut Shot, Position 6
5
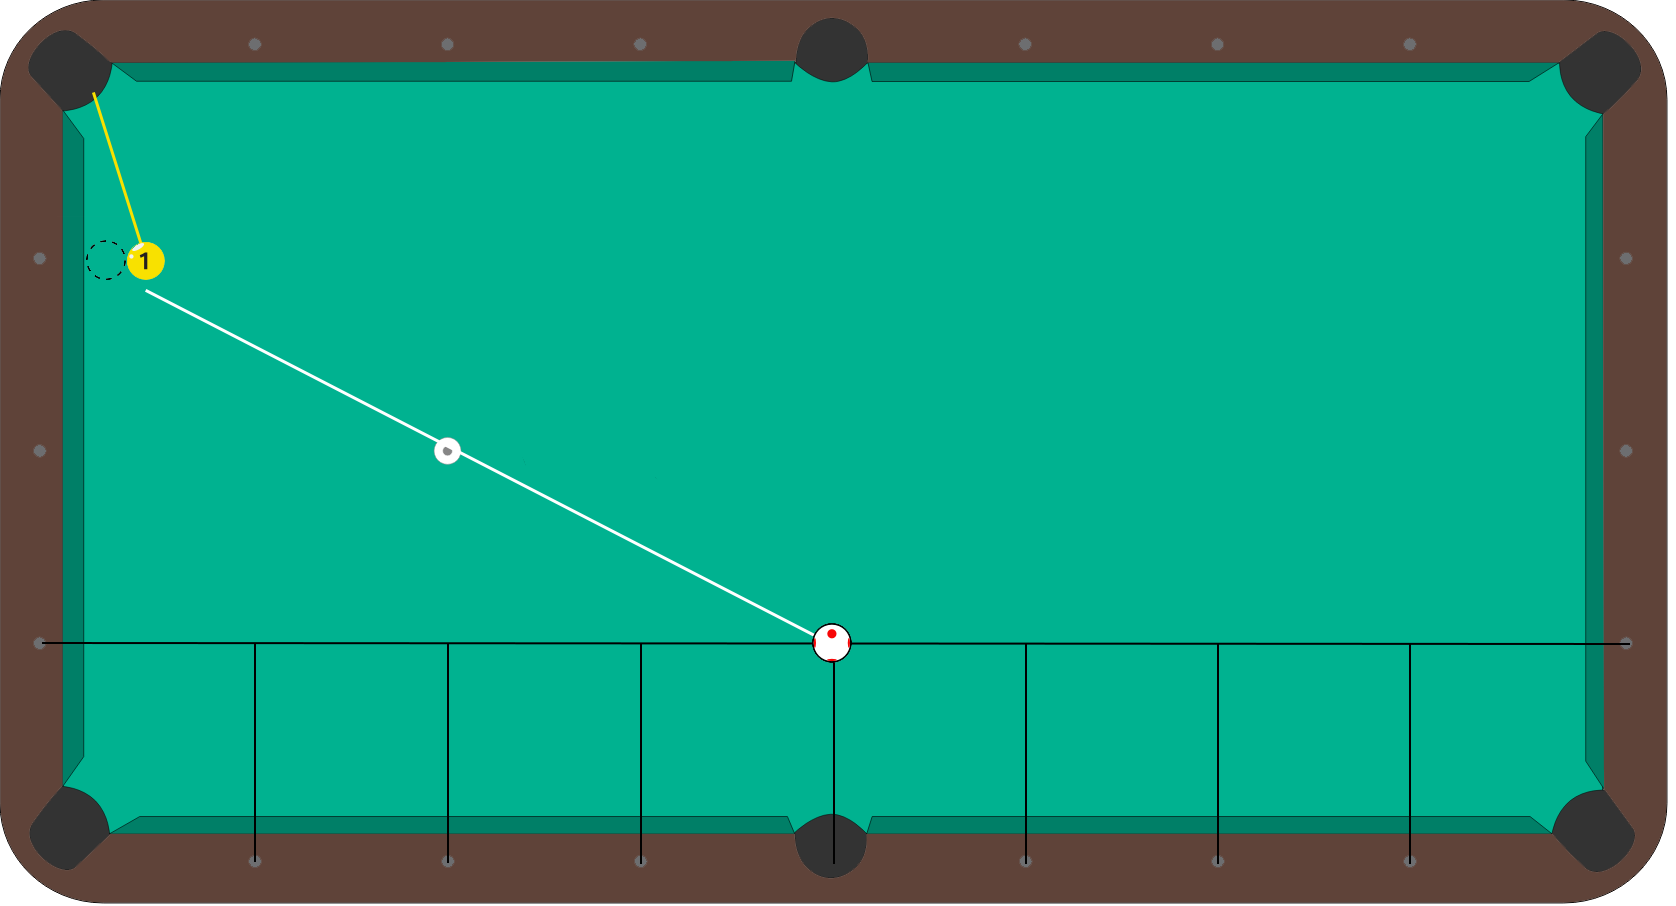
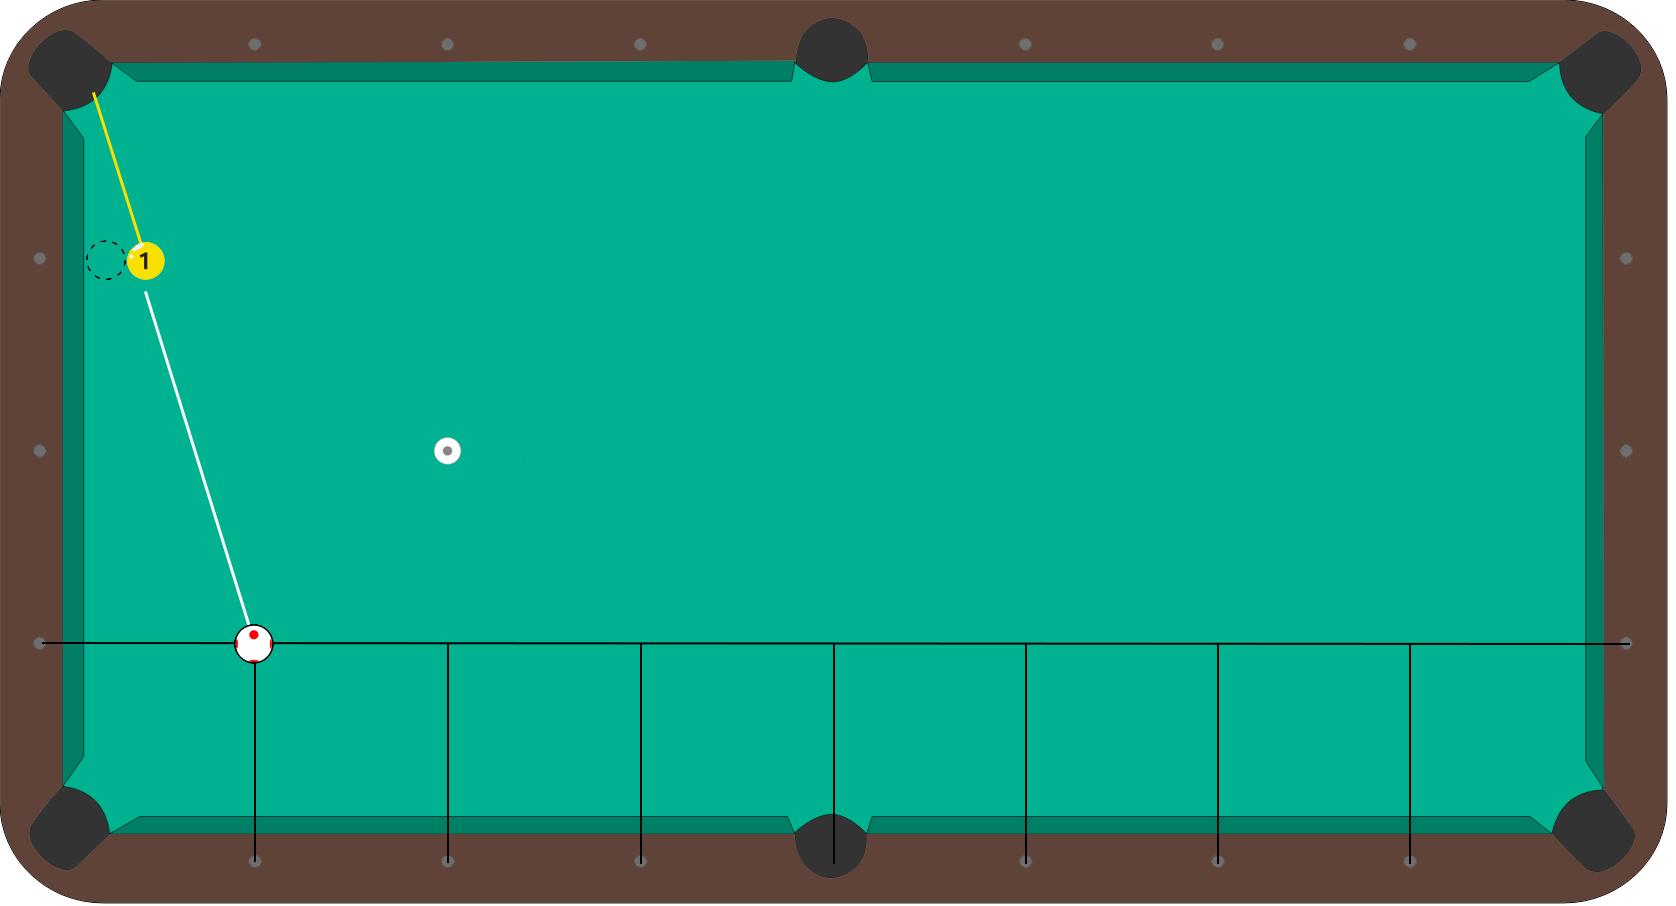
Billiard University Exam 1 Cut Shot, Position 5
4
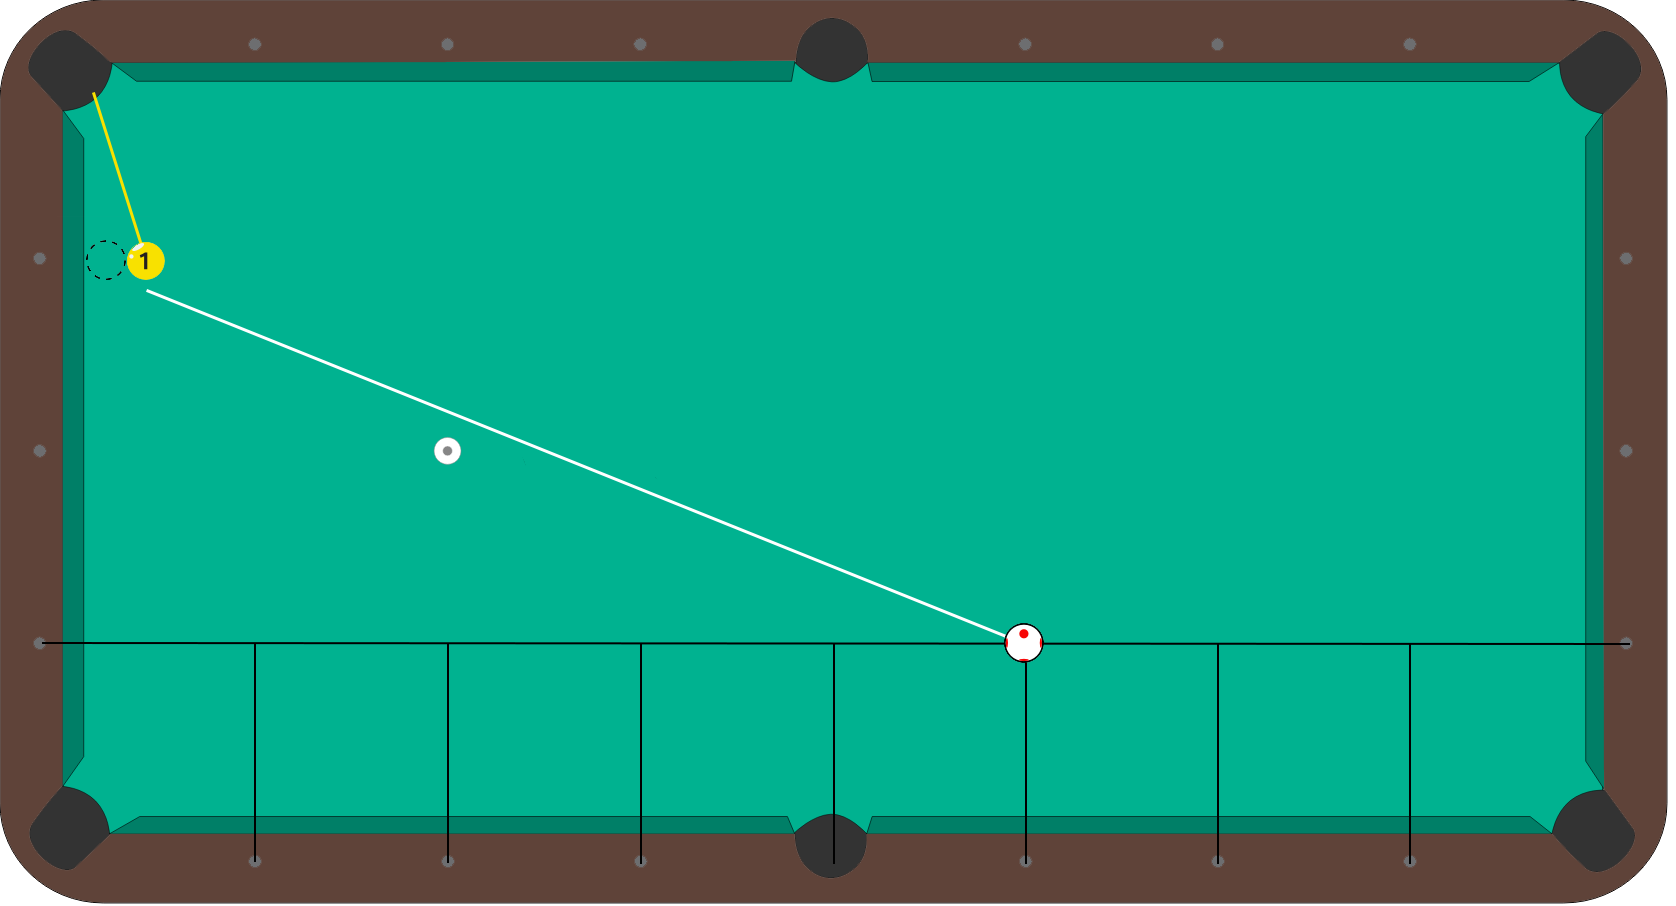
Billiard University Exam 1 Cut Shot, Position 4
3
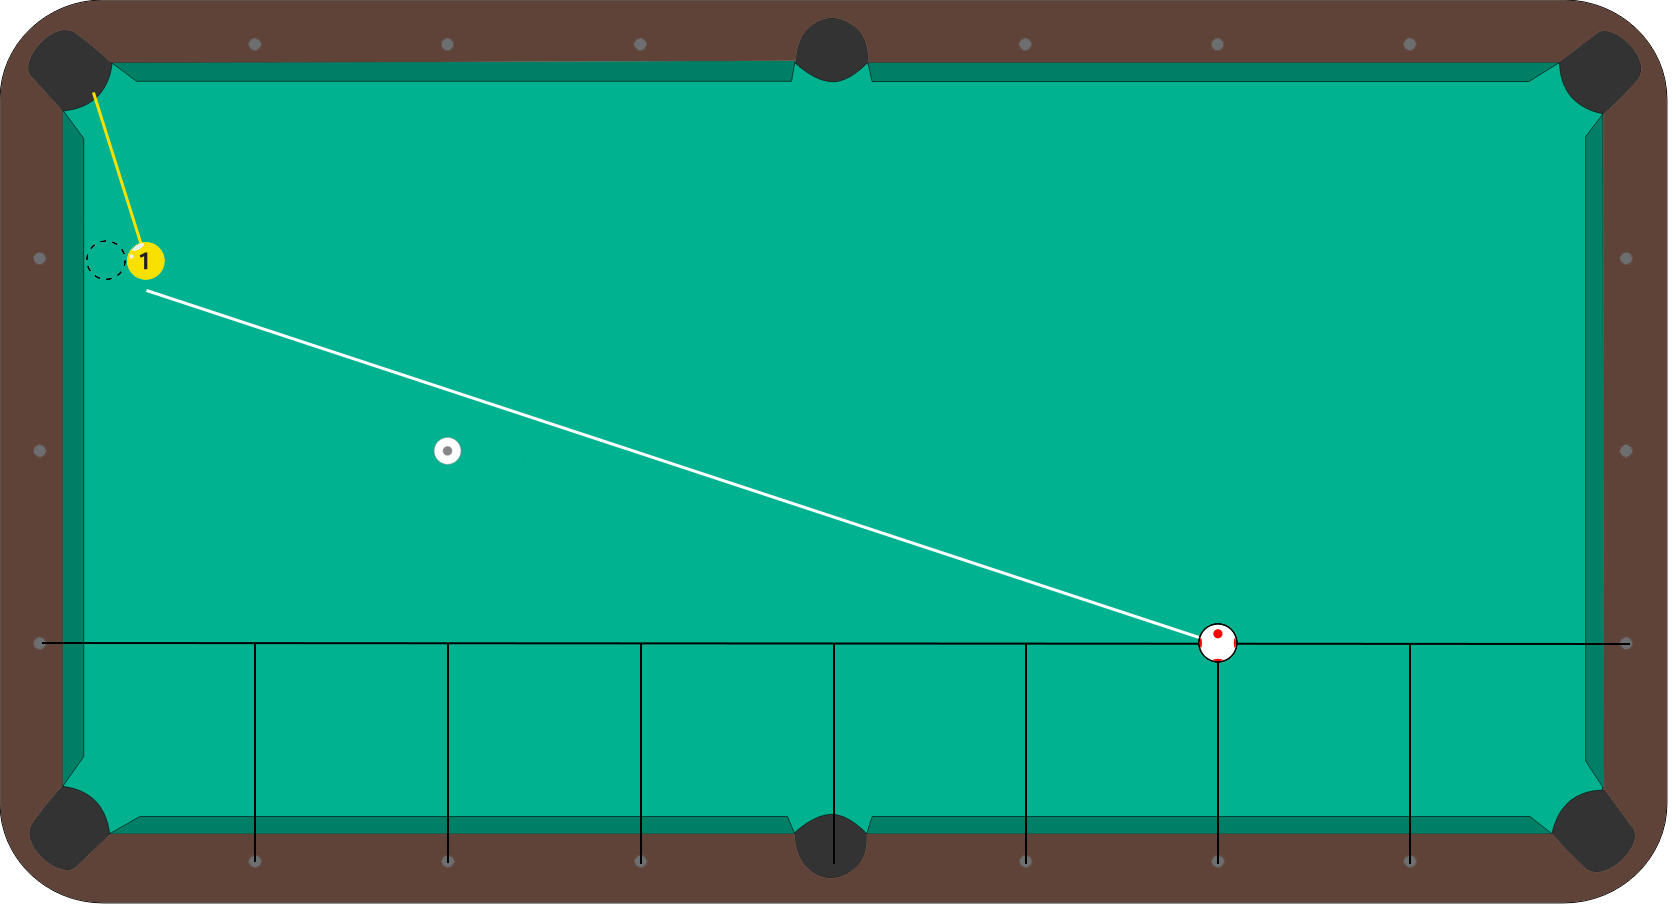
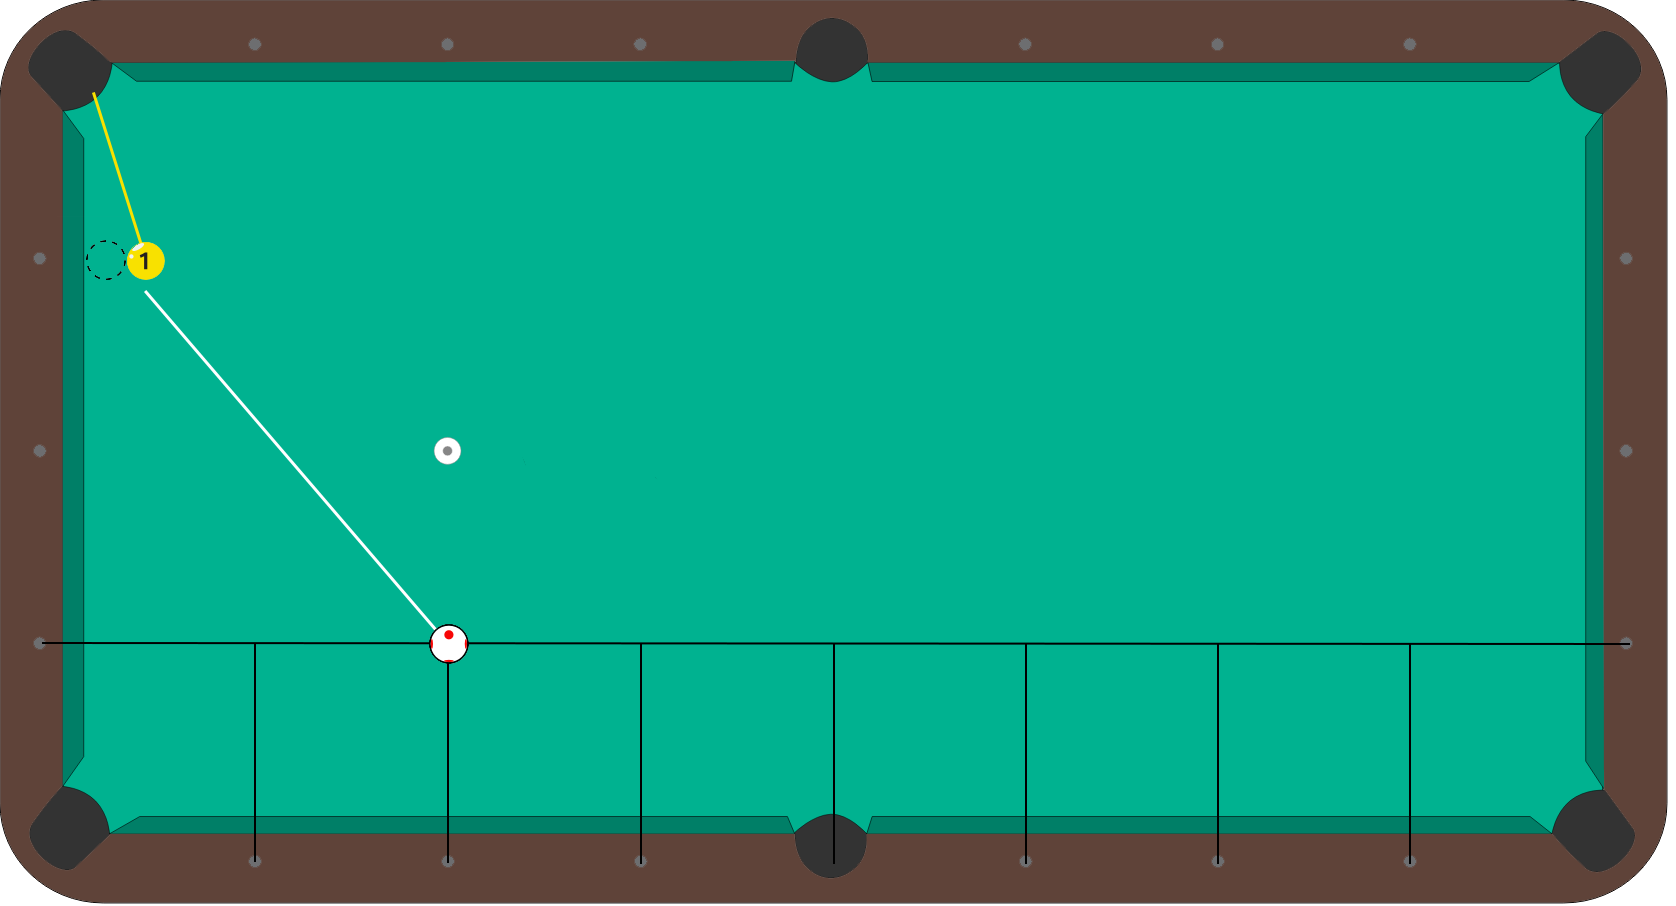
Billiard University Exam 1 Cut Shot, Position 3
2
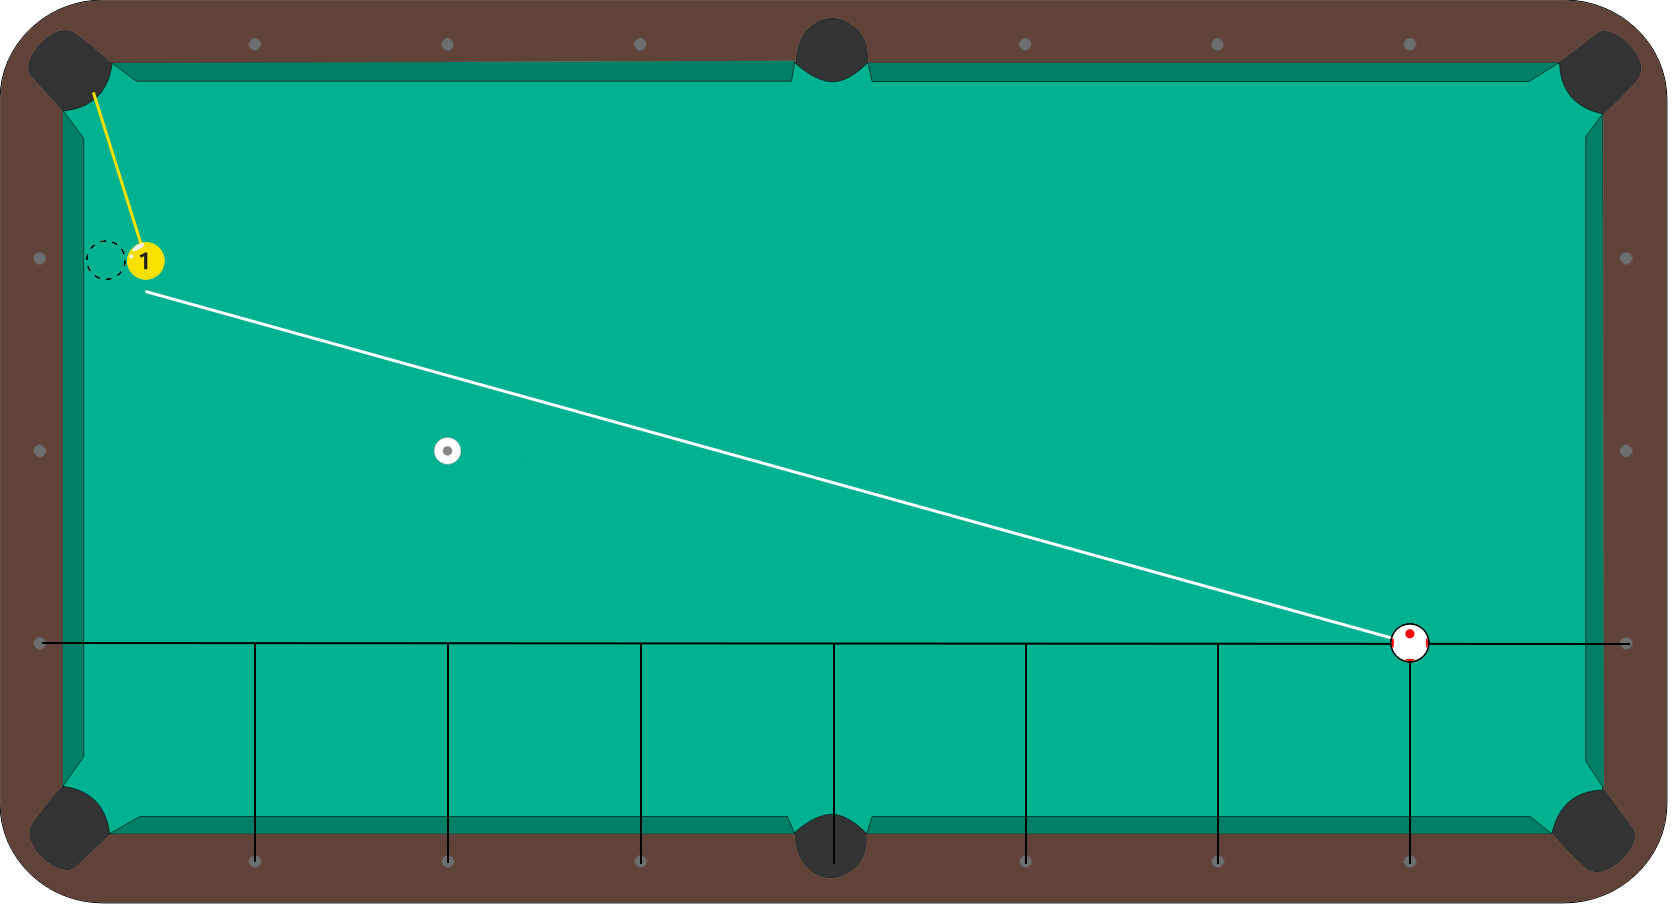
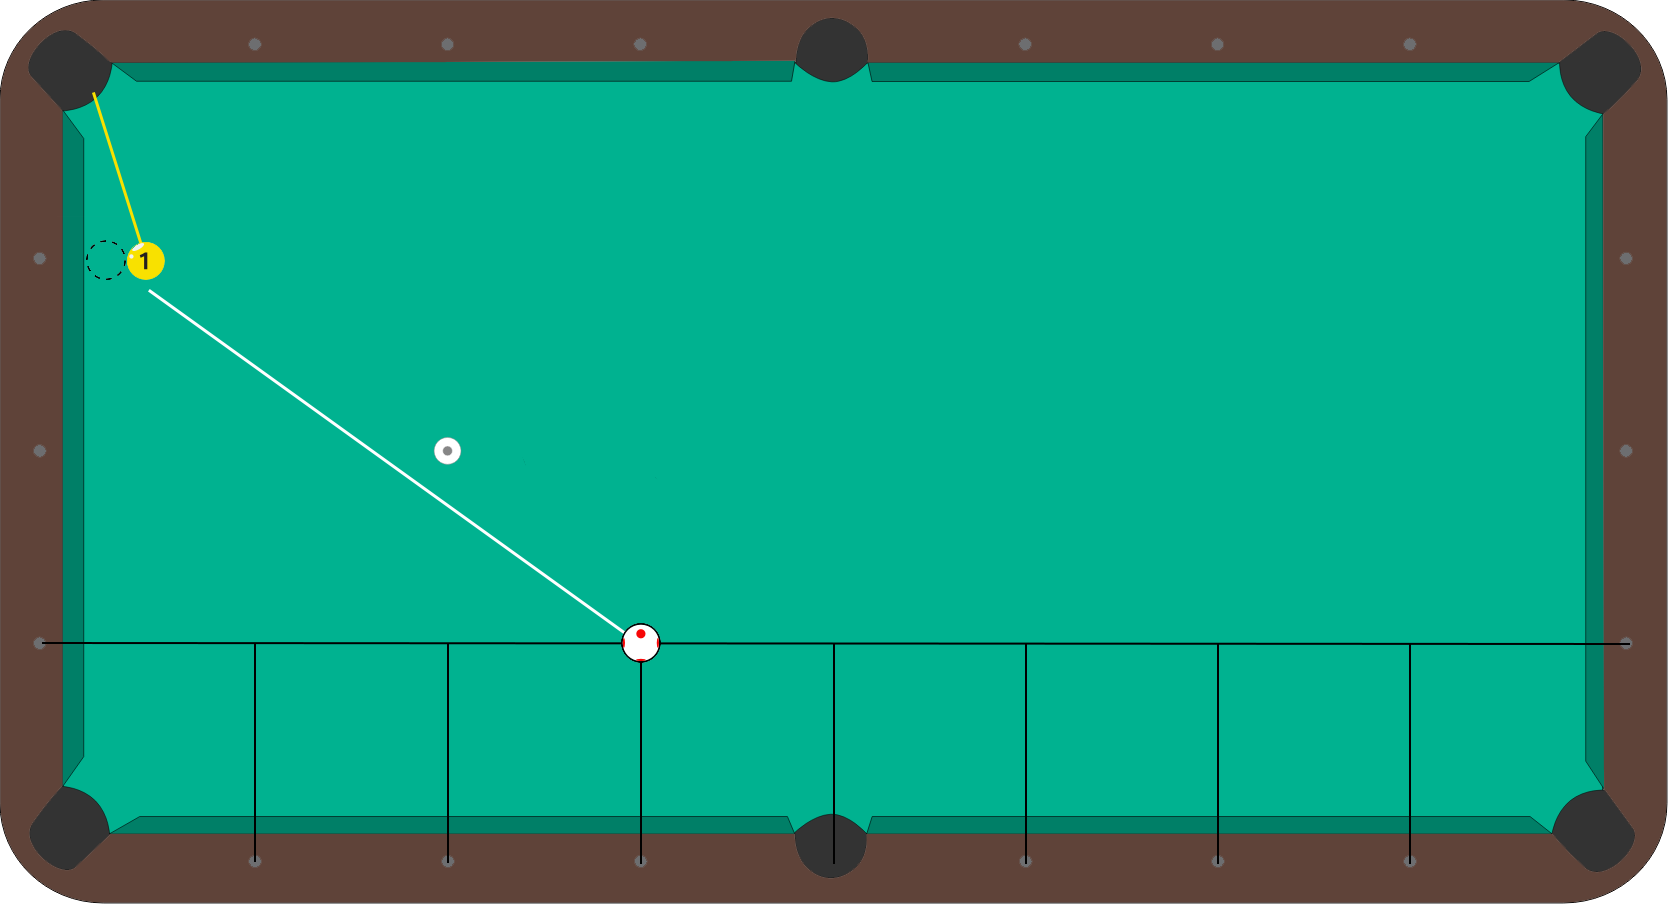
Billiard University Exam 1 Cut Shot, Position 2
1
Billiard University Exam 1 Cut Shot, Position 1